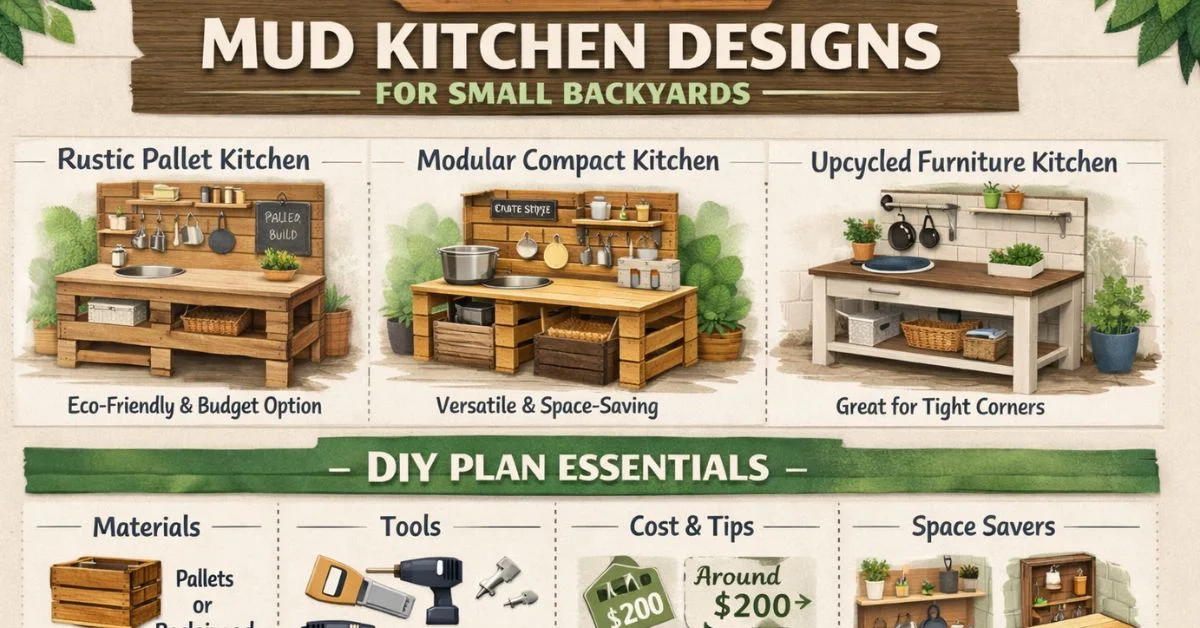
Modern DIY Mud Kitchen Designs Plans for Small Backyards
Building a DIY mud kitchen for a small backyard requires precise planning and weather resistant materials. Focus on a compact design measuring 36 inches wide by 18 inches deep with a counter height of 20 to 22 inches for children aged 2 to 5. Use naturally rot resistant cedar or treated pine for longevity. Include a drop in stainless steel sink bowl, open shelving underneath, and a vertical backsplash with pegboard storage. Seal all wood with marine grade polyurethane. This footprint fits patios, balconies, and narrow side yards while providing full sensory play functionality without dominating your outdoor living space.
Why Build a Mud Kitchen for Your Small Backyard
Outdoor play is essential for childhood development, but space constraints often force families to choose between adult relaxation areas and children’s activities. A well designed mud kitchen solves this dilemma. It creates a dedicated sensory play station that doubles as attractive garden furniture when not in use. Unlike bulky plastic play sets, a custom built mud kitchen blends seamlessly with modern landscaping while offering endless opportunities for messy, imaginative play.
The beauty of building your own lies in total control over dimensions, materials, and features. You are not stuck with fixed sizes from a store bought unit. You can tuck a compact kitchen into an awkward corner, wrap it around a existing post, or build it on locking casters to roll away when guests arrive. This guide walks you through every step of creating a durable, beautiful, and space efficient mud kitchen that will survive rain, sun, and enthusiastic toddler use for years.
Understanding the Core Benefits of Mud Play
Before diving into lumber and screws, it helps to understand why mud kitchens matter so much for young children. Pediatric occupational therapists consistently recommend messy play for developing fine motor skills. When a child scoops wet sand, pours water through a funnel, or mixes soil with a wooden spoon, they strengthen the small muscles in their hands and fingers. These same muscles are later responsible for holding a pencil correctly and using scissors.
Beyond motor skills, mud play engages multiple senses simultaneously. The cool temperature of wet dirt, the earthy smell of fresh soil, the sound of water dripping into a metal bowl, and the visual transformation of ingredients into a “mud pie” all stimulate neural connections. This sensory integration helps children process information from their environment more effectively.
Social and emotional benefits are equally important. A mud kitchen naturally encourages cooperative play. Children negotiate who gets to use the faucet, trade wooden spoons, and collaborate on elaborate recipes. They practice language skills by describing what they are making. They learn patience when waiting for their turn at the sink. All of this happens organically, without worksheets or structured lessons, simply through the joy of making a mess outdoors.
Space Planning for Tiny Backyards
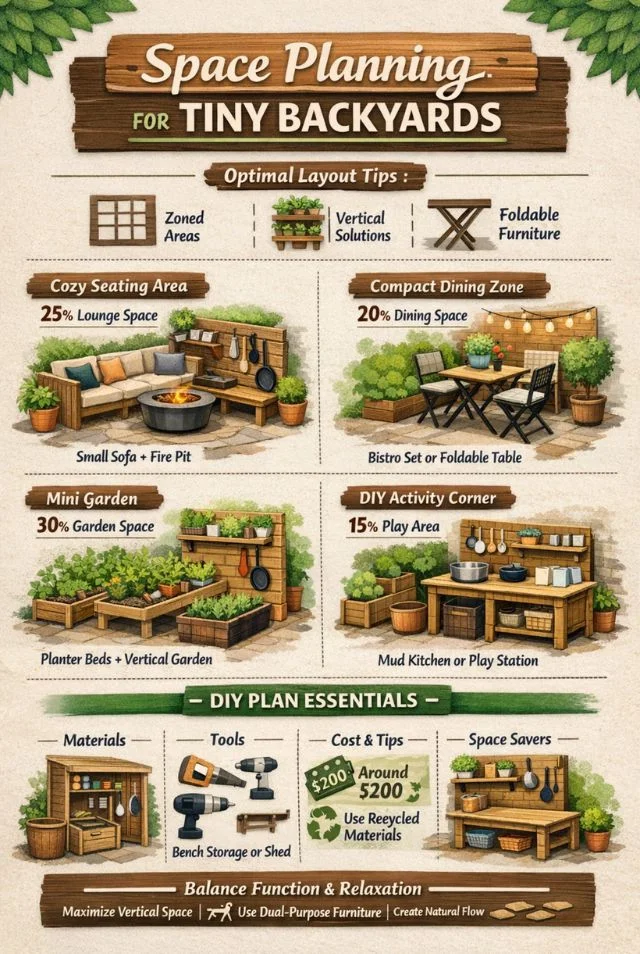
The most common mistake people make is choosing a design that is too large for their available space. Measure your intended location carefully before looking at any plans. Consider not just the footprint of the kitchen itself, but also the clearance needed for children to move around it. You need at least two feet of open space in front of the counter for a child to stand and play comfortably.
Ideal Compact Dimensions
For a small backyard, balcony, or narrow side yard, these dimensions work extremely well:
- Width: 32 to 36 inches. This is narrow enough to fit in tight spaces but wide enough for two children to play side by side.
- Depth: 16 to 18 inches. Deeper than this eats into walkways. Shallow designs still provide adequate workspace.
- Total Height: 36 inches including the backsplash. The counter itself should sit at 20 to 22 inches from the ground.
- Leg Clearance: Leave at least 12 inches under the bottom shelf for storing buckets or watering cans.
Vertical Storage Solutions
When ground space is limited, build upward. The backsplash is prime real estate for organization. Install a pegboard panel made from exterior grade hardboard or thin plywood. Mount it securely to the back legs or directly to the wall if the kitchen sits against a fence. Add cup hooks, small shelves, and magnetic strips to hold metal utensils.
Overhead storage is another option for freestanding units. A shallow shelf positioned 10 inches above the counter can hold jars of baking soda, dried beans for sensory bins, or small watering cans. Just ensure the shelf does not block the child’s view or create a tipping hazard.
Fold Away and Modular Designs
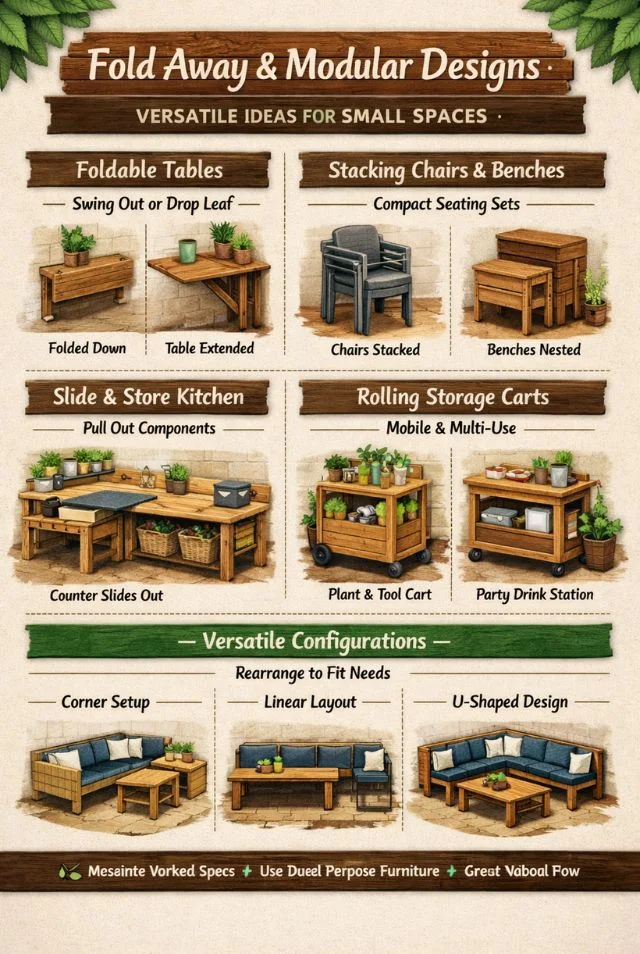
For extremely tight spaces like apartment balconies, consider a folding mud kitchen. Build the main frame at standard depth, but add a side wing on heavy duty locking hinges. This wing folds flat against the side when not in use and swings out to provide extra prep space during play. Another approach is to build the entire kitchen on locking casters. Roll it out for play sessions and tuck it into a storage shed or garage corner when adults need the full patio.
Selecting the Right Materials
Material choice directly determines how many seasons your mud kitchen will survive. Outdoor conditions are harsh. Rain soaks into unprotected wood, causing rot and warping. Sunlight breaks down lignin, turning surfaces gray and brittle. Freeze thaw cycles crack joints and split boards. Choose wisely from the start.
Wood Options Compared
Cedar is the gold standard for outdoor children’s furniture. It contains natural oils that repel insects and resist moisture. Cedar does not require chemical treatment, making it completely safe for food contact once sealed. The wood is lightweight yet strong, and it machines beautifully with standard tools. Cost is higher than pine, but a small mud kitchen uses only about 20 to 30 board feet, keeping the price reasonable.
Treated Pine is affordable and readily available at any lumber yard. Modern pressure treated wood uses copper based preservatives that are considered safe for outdoor use. However, some parents prefer to avoid any chemical contact for young children who might put their hands in their mouths after playing. If you choose treated pine, seal it thoroughly with a waterproof barrier and consider adding a separate countertop of untreated cedar.
Untreated Whitewood is the cheapest option, but it will not last. Expect warping within six months and visible rot after one rainy season. This is only suitable for temporary setups or indoor play kitchens.
Upcycled Pallets can work if you are careful. Look for pallets stamped with “HT” for heat treated. Avoid any marked “MB” for methyl bromide, a toxic fumigant. Also avoid pallets that have visible spills or strange odors. Sand pallet wood thoroughly because splinters are common.
Hardware and Fasteners
Never use standard interior screws or nails outdoors. Moisture will rust them within weeks, leaving brown streaks on your beautiful cedar. Buy exterior grade decking screws with ceramic coating or stainless steel. These resist corrosion and maintain holding power.
For hidden joinery, pocket hole screws should also be exterior rated. Standard pocket screws from hardware kits are usually for indoor use only. Read labels carefully.
Waterproof wood glue adds significant strength to joints. Look for Type III water resistant glue, which is designed for exterior applications.
Sealing and Finishing
Raw wood will not survive outdoors regardless of species. You must apply a protective finish. Marine grade polyurethane is the best choice for mud kitchens because it forms a hard, waterproof film that resists standing water and scrubbing. Apply two to three thin coats, sanding lightly with 220 grit sandpaper between coats. Allow 24 hours of drying time after the final coat before letting children play.
For a more natural look, use exterior penetrating oil. Tung oil or teak oil soaks into the wood fibers and repels water without forming a surface film. Oils need reapplication every six to twelve months, but they are easier to repair than polyurethane.
Avoid standard deck stain. Many contain fungicides and pigments that are not safe for children’s hands or potential mouth contact.
Essential Features of a Great Mud Kitchen
Not all mud kitchens are created equal. The difference between a basic dirt table and an engaging sensory station comes down to thoughtful details. Include these features in your plans.
The Sink
A real sink transforms play. The simplest approach is to cut a hole in the countertop and drop in a stainless steel mixing bowl. The bowl’s lip rests on the counter, holding it securely while allowing easy removal for cleaning. Choose a bowl that is at least 8 inches wide and 4 inches deep. Shallow bowls spill too easily.
For a more integrated look, use a rectangular plastic storage bin. IKEA Trofast bins work perfectly. Cut a recess into the countertop so the bin sits flush or slightly proud. This creates a built in basin that children can fill with water, mud, or sand.
Running Water
A working faucet takes the kitchen to another level. The easiest water source is a gravity fed drink dispenser. Mount a shelf 12 inches above the counter and place a 2 gallon beverage dispenser with a spigot on it. Children can open the spigot to let water flow into the sink below. The sink needs a drain. Drill a hole in the bottom of your sink bowl and attach a hose barb fitting. Run a length of clear vinyl hose into a bucket hidden under the counter.
For continuous water, connect a garden hose adapter to a real brass faucet. This requires a nearby outdoor spigot and adult supervision to turn the water on and off. But it provides unlimited running water for serious mud play.
Work Surfaces
Children need flat, smooth space to roll dough, chop leaves with a plastic knife, and arrange their creations. Your countertop should offer at least 18 inches of uninterrupted surface next to the sink. If your total width is 36 inches and the sink takes 10 inches, you still have 26 inches of prep space. That is generous.
Sand the countertop to 120 grit, then to 220 grit for a silky smooth finish that will not cause splinters. Round over all edges and corners with a router or sanding block. A sharp corner at a child’s eye level is an accident waiting to happen.
Storage and Organization
Open shelving underneath the counter is essential for storing pots, pans, muffin tins, and mixing bowls. Use slatted shelves with quarter inch gaps between boards so spilled water drains through rather than pooling.
The backsplash should hold frequently used utensils. Cup hooks are cheap and effective. Mount them at varying heights so children can reach everything. A small wooden tool caddy attached to the side holds spoons, spatulas, and whisks.
Play Stove and Oven
Adding simulated cooking elements extends imaginative play. Paint two black circles on the countertop to represent burners. Mount old cabinet knobs nearby as clicking dials. Build a small lower compartment with a door to serve as an oven. Children love putting their “baking” inside and closing the door.
Keep the oven door simple. A hinged piece of plywood with a magnetic catch works perfectly. Drill a few ventilation holes so air can circulate.
Step by Step Construction Guide
This section provides clear instructions for building a compact mud kitchen measuring 34 inches wide, 18 inches deep, and 36 inches tall. Adjust dimensions to fit your specific space.
Tools You Will Need
- Miter saw or circular saw
- Power drill and impact driver
- Orbital sander with 80, 120, and 220 grit sandpaper
- Pocket hole jig
- Tape measure and speed square
- Clamps
- Jigsaw for cutting the sink hole
Materials List
- 4 pieces of 2×4 lumber, 8 feet long (cedar or treated pine)
- 6 pieces of 1×6 cedar fence pickets, 6 feet long
- 2 pounds of 2.5 inch exterior decking screws
- 1 pound of 1.25 inch exterior pocket hole screws
- Waterproof wood glue
- One stainless steel mixing bowl, 10 inch diameter with lip
- Cup hooks and pegboard accessories
- Marine grade polyurethane
Cutting the Lumber
From your 2x4s, cut the following pieces:
- 2 pieces at 22 inches (front legs)
- 2 pieces at 40 inches (back legs, which also form the backsplash supports)
- 2 pieces at 31 inches (front and back aprons)
- 2 pieces at 15 inches (side aprons)
- 2 pieces at 15 inches (shelf support cleats)
From your cedar fence pickets, cut:
- 3 pieces at 34 inches (countertop)
- 3 pieces at 34 inches (backsplash)
- 4 pieces at 15 inches (bottom shelf slats)
Building the Base Frame
Lay the two front legs parallel on a flat work surface. Position the front apron between them at the top, flush with the tops of the legs. Use your pocket hole jig to drill holes in the ends of the apron, then attach with glue and 2.5 inch screws. Repeat for the bottom apron, positioning it 6 inches up from the bottom of the legs.
Repeat this process for the back legs. The back legs are taller, so the aprons attach at the same heights as the front. The space between the top apron and the top of the back leg will later hold the backsplash.
Connect the front and back frames using the side aprons. Drill pocket holes in both ends of each side apron and screw them securely to the leg assemblies. You now have a rectangular box frame.
Installing the Countertop
Lay your three 34 inch cedar pickets across the top of the frame. Arrange them tightly together. Clamp them in place. Drive 1.25 inch screws upward through the aprons into the underside of the pickets. This hides the screw heads.
Trace your stainless steel bowl upside down on the countertop. Mark the outer edge of the lip. Draw a second circle one half inch inside the first line. Drill a pilot hole inside the inner circle, insert your jigsaw, and carefully cut along the inner line. The bowl should drop in with its lip resting on the wood.
Adding the Backsplash
Attach the three 34 inch backsplash pickets horizontally across the extended back legs. Start at the very top of the legs and work downward, leaving a half inch gap between each picket for visual interest. Use 2.5 inch screws driven through the backsplash into the legs.
Installing the Bottom Shelf
Screw the shelf support cleats to the inside of the front and back legs at 6 inches off the ground. Lay your four 15 inch shelf slats across the cleats, leaving a quarter inch gap between each slat for drainage. Secure with screws.
Sanding and Finishing
Sand every surface thoroughly. Start with 80 grit to remove saw marks and rough spots. Move to 120 grit for smoothing. Finish with 220 grit for a silky feel. Pay special attention to corners and edges, rounding them slightly.
Apply your first coat of marine polyurethane with a natural bristle brush. Let it dry completely. Lightly sand with 220 grit to knock down raised grain. Apply a second coat. Repeat for a third coat if desired.
Final Assembly and Hardware
Screw cup hooks into the backsplash at heights a child can reach. Mount a pegboard panel if you prefer. Attach magnetic strips for holding metal utensils. Install cabinet knobs as stove dials by drilling pilot holes and screwing them in from underneath.
Place your sink bowl into the hole. Add a drain if desired. Your mud kitchen is ready for play.
Accessories That Enhance Play
The kitchen itself is just the beginning. Stock it with durable, engaging accessories that inspire creativity.
Utensils and Cookware
Visit thrift stores for heavy duty metal muffin tins, small cast iron skillets, wooden spoons, ladles, and measuring cups. Avoid thin plastic that will crack in the sun. Stainless steel and solid wood withstand outdoor conditions beautifully.
Sensory Materials
Keep bins of dry beans, rice, and pasta for scooping and pouring. Add sand, small pebbles, and clean soil. Rotate materials weekly to maintain interest. Store everything in sealed plastic containers under the kitchen.
Chalkboard Menu
Paint a section of the backsplash with exterior chalkboard paint. Provide a small bucket of chalk. Children love writing menus, recipes, and prices for their mud pies.
Funnels and Tubes
Attach clear acrylic tubes or plastic funnels to the backsplash using pipe clamps. Children pour water or sand through these chutes, learning about gravity and flow in the process.
Seasonal Maintenance and Longevity
Even the best built mud kitchen needs occasional care. Set up a simple maintenance schedule.
Spring Refresh
After winter storage, scrub the entire kitchen with mild soap and a stiff brush. Rinse thoroughly. Check for any loose screws or cracked boards. Sand any rough spots. Test the sealant by sprinkling water on the countertop. If water soaks in rather than beading up, apply a fresh coat of polyurethane.
Summer Care
During hot, dry weather, wood can shrink and crack. Move the kitchen into shade if possible. Water exposed wood occasionally with a garden hose to keep it from drying out too much. Tighten any screws that have loosened.
Winter Protection
Before freezing temperatures arrive, remove the metal sink bowl to prevent cracking from ice expansion. Store all accessories indoors. Cover the entire structure with a waterproof tarp secured with bungee cords. If possible, move the kitchen into a garage or shed for the winter.
Common Mistakes to Avoid
Learn from others’ errors. These pitfalls frequently ruin mud kitchens.
Skipping the sealant. Raw wood outdoors rots within a single season. Always apply multiple coats of marine grade finish.
Using indoor screws. Standard screws rust quickly, leaving stains and losing holding power. Exterior screws cost pennies more.
Making the counter too high. Measure your child’s standing elbow height. The counter should be slightly below that level for comfortable play.
Forgetting drainage. Standing water in sinks and on shelves grows mold and attracts insects. Design everything to drain.
The building is too large. A massive mud kitchen overwhelms a small backyard and gets used less often because it dominates the space.
Commercial Options Versus DIY
You might wonder whether buying a ready made mud kitchen makes more sense. Here is an honest comparison.
Prefab Mud Kitchens
Store bought kitchens offer immediate gratification. Unbox, assemble, and play within an hour. Many come with accessories included. Warranties provide peace of mind.
However, fixed dimensions rarely fit unusual spaces. Most are built from lightweight fir or pine that deteriorates quickly outdoors. Shipping costs are high due to bulky packaging. You cannot customize colors, sink depth, or storage layout.
DIY Mud Kitchen
Building your own requires tools, time, and basic woodworking skills. But the advantages are substantial. You control every dimension to fit your exact space. You choose premium materials like cedar that outlast store bought units by years. Total cost for a high end DIY kitchen is typically $100 to $150 in lumber and hardware, compared to $300 to $600 for a comparable commercial model. You also gain the satisfaction of creating something with your own hands.
For most families with small backyards, DIY is the clear winner.
Conclusion
A mud kitchen transforms a forgotten corner of your small backyard into a hub of creativity and learning. Children will spend hours mixing, pouring, scooping, and pretending. They will develop fine motor skills, social abilities, and sensory processing without ever feeling like they are doing anything other than playing.
Building from scratch using the plans in this guide gives you a structure that fits perfectly, lasts for years, and looks beautiful enough to leave in place all season. Start with good materials, follow the construction steps carefully, and seal everything thoroughly. Then step back and watch the magic happen. The muddy hands, the delighted squeals, and the imaginative recipes will make every saw cut and sanding session worth the effort.
FAQs
1. What is the best size for a mud kitchen in a small backyard?
The ideal compact size is 32 to 36 inches wide, 16 to 18 inches deep, with a counter height of 20 to 22 inches for children aged 2 to 5, which fits patios, balconies, and narrow side yards without overwhelming the space.
2. What type of wood is best for an outdoor mud kitchen?
Cedar is the top choice because it is naturally rot resistant and safe for children, but treated pine is a budget friendly alternative; avoid untreated whitewood as it warps within one season.
3. How do I make a mud kitchen weather resistant?
Seal all wood with two to three coats of marine grade polyurethane or exterior penetrating oil, use stainless steel or ceramic coated exterior screws, and cover the unit with a waterproof tarp during winter months.
4. Can I add running water to a small mud kitchen without a hose connection?
Yes, mount a gravity fed drink dispenser on an upper shelf with a spigot, and place a bucket under the sink to catch drained water, creating a fully functional recirculating sensory station.
5. How much does it cost to build a DIY mud kitchen compared to buying one?
A high quality DIY mud kitchen costs roughly $100 to $150 in lumber and hardware, while a comparable commercial unit runs $300 to $600, making DIY significantly more affordable and customizable.

As an admin, with a passion for transforming spaces and a sharp eye for design trends, I created Interior Design Style Quiz to help homeowners make confident, informed decisions about their homes from the curb all the way inside.